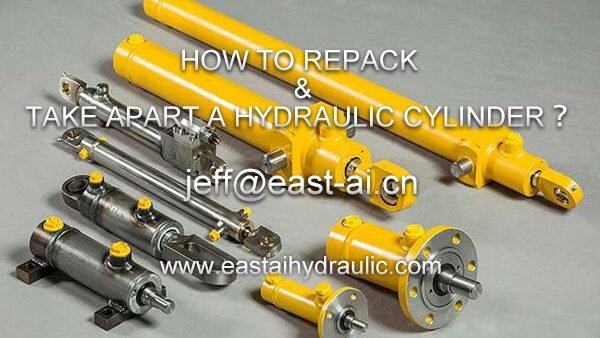
HOW TO REPACK & TAKE APART A HYDRAULIC CYLINDER ?
Repacking a hydraulic cylinder is a crucial maintenance task that helps prolong the life of hydraulic equipment. Whether you’re maintaining heavy machinery or smaller hydraulic systems, knowing how to properly repack a cylinder can prevent costly repairs and extend the service life of your equipment. This guide will take you through the process step-by-step, covering everything from recognizing when repacking is necessary to the tools you’ll need and an 8-step process for successfully repacking your cylinder.
Why Repacking a Hydraulic Cylinder is Important?
The Role of Hydraulic Cylinders in Equipment
Hydraulic cylinders are integral components in various machinery, converting hydraulic fluid power into linear motion. They are used in a wide range of applications, from construction equipment to industrial machines, making their maintenance vital for operational efficiency.
Benefits of Regular Repacking
Regular repacking ensures that the seals within the cylinder remain effective, preventing leaks and maintaining optimal performance. It also helps in avoiding unexpected breakdowns and prolongs the overall lifespan of your hydraulic system.
Recognizing When Your Cylinder Needs Repacking
Signs of Wear and Tear
Over time, the seals within a hydraulic cylinder can wear out due to constant use, leading to issues like fluid leaks and reduced operational efficiency. Look out for visible signs of fluid leaks, which often indicate that the seals need to be replaced.
Performance Issues to Watch For
If you notice decreased performance, such as slower response times or difficulty in maintaining pressure, it may be time to repack your hydraulic cylinder. These performance issues often point to failing seals that no longer effectively contain hydraulic fluid.
Essential Tools for Hydraulic Cylinder Repacking
Basic Tools for Cylinder Disassembly
To begin the repacking process, you’ll need several basic tools, including wrenches, pliers, and screwdrivers. These tools will help you disassemble the cylinder and access the internal components.
Specialized Equipment for Hydraulic Seal Replacement
In addition to basic tools, specialized equipment like a seal installation tool or resizing kit is necessary. These tools ensure that the new seals are correctly installed and sized, preventing future leaks.
Safety Gear Requirements
Safety is paramount when working with hydraulic systems. Ensure you have the necessary safety gear, such as gloves, safety glasses, and steel-toed boots, to protect yourself during the repacking process.
8-Step Process for Repacking a Hydraulic Cylinder
Step 1: Preparing the Workspace
Start by organizing a clean workspace. This prevents contamination of the cylinder’s internal components and ensures you can easily locate tools and parts throughout the process.
Step 2: Releasing Hydraulic Pressure
Before you start disassembly, make sure to release any residual hydraulic pressure. This step is crucial to avoid accidents and injuries.
Step 3: Disassembling the Cylinder
Carefully remove the cylinder from the equipment. Keep track of the assembly order or take photos to assist with reassembly later. Loosen and remove the cylinder head using the appropriate tools.
Step 4: Removing the Piston and Rod
With the cylinder head removed, gently extract the piston and rod assembly. Inspect these components for signs of wear and damage, which will guide your decision on whether to replace certain parts.
Step 5: Inspecting and Replacing Seals
Check the seals for any wear or damage. Replace any seals that show signs of cracking, hardening, or deformation with new ones that match the specifications of your cylinder.
Step 6: Resizing and Installing New Seals
Use a resizing tool to adjust the new seals to the correct dimensions before installing them. Properly fitted seals are crucial for preventing leaks and ensuring smooth operation.
Step 7: Reassembling the Cylinder
Reassemble the cylinder by reversing the disassembly steps. Ensure that all parts are clean and free of debris, and use the correct torque specifications to tighten bolts and fittings.
Step 8: Testing the Repacked Cylinder
Once reassembled, test the cylinder to ensure it operates correctly. Check for leaks and verify that it functions smoothly under normal operating conditions.
Tips for a Successful Repack
Inspecting Components After Disassembly
During disassembly, inspect all components thoroughly for signs of wear or damage. Replacing worn parts during repacking can prevent future failures and extend the life of your hydraulic cylinder.
Ensuring Proper Seal Placement
Double-check that all seals are properly placed before reassembly. Incorrectly installed seals can lead to leaks and reduced cylinder performance.
The Importance of Testing
Testing after reassembly is crucial to ensure that the cylinder operates as expected. This step helps you catch any issues before they lead to more significant problems during operation.
When to Seek Professional Help
Complex Repairs and Rebuilds
While repacking can be done as a DIY project, some hydraulic cylinder issues are too complex for a non-professional to handle. In such cases, it’s best to seek professional help to avoid further damage.
Troubleshooting Persistent Issues
If problems persist even after repacking, it may indicate deeper issues within the hydraulic system. Consulting a professional can help diagnose and address these problems effectively.
Repacking a hydraulic cylinder is an essential maintenance task that can significantly extend the life of your equipment. By following the steps outlined in this guide and using the correct tools and techniques, you can ensure that your hydraulic cylinder continues to operate efficiently. Regular maintenance and attention to detail during repacking will keep your machinery running smoothly and reduce the likelihood of costly repairs.

